These were the first two stamps I made and they turned out pretty well. The great thing about stamps is that they are supposed to be somewhat rough. If you wanted them precise and clean then you might as well create something on Adobe Illustrator. I like these because they look, well, handmade. I initially found out how to do these from one of my favorite blogs, Geninne's Art Blog. She has a hand carved stamp tutorial that is fantastic. She even has a video where she shows you how to carve and all the tools you need.
The greatest form of flattery is imitation, right? Well I thought the greatest way to learn is through imitation as well. I took Geninne's video tutorial and tried my own feather. Mine is slightly different, but same concept. I was very excited with the results. The white on the black paper looks really good, don't you think? At this point, I'm thinking "Wow! I can do birthday cards, notes, etc.!" Not so fast. When do I have time for that? It's so much easier to buy it from Target, right? Well I'm going to try to change my ways and now that I know how to do this I'm definitely going to "experiment" more.
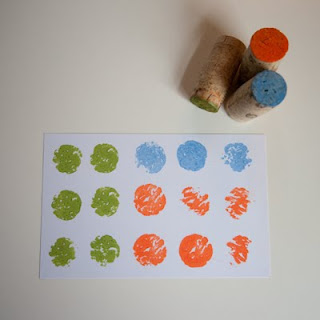
Here I found a way to do stamps with a lot of different types of products other than stamps. I found this, of all places, in a Family Circle magazine. I ripped it out (covertly, of course) of one of the magazines at my doctor's office. But you can find it here online, no ripped pages. They all sorts of items, such as bubble wrap, candle sticks, lids or caps from bottles, and the weirdest...a ravioli cutter. Yeah, I got one of those, not. But I might go buy one just to make the cool stamp.
I made this one for my neighbor when he brought me some acorn squash, eggplant and yellow squash. The acorn squash, which is usually green, is doubling for a pumpkin now.
Okay, I got a little cutesy here but Lia liked it, and really, when you start to inspire your kids to make their own stamps then cutesy is okay.
These are the things I used to make my stamps. You can also use plain white erasers like this one, or any of the Staedtler Mastercarve Artist Carving Blocks. They cut like butter with this Speedball linoleum cutter (Haha - I rhymed). And of course, the ink is Color Box stamp pads.
I have purchased my products from either Dick Blick online or at my local Dick Blick store. If you don't have a store near you try Jo-Anne Fabrics. Don't go to Michael's. They are so much more expensive.
Have fun and happy carving!


Wow I have enjoyed your blog today. I am a rubber stamper and am impressed by your handmade stamps. Awesome.
ReplyDeleteAnd I loved your pictures of the alpacas. What kind of camera do you use??? Beautiful.
Brenda, Katie's mom again
nothing to do today but sit with Kate and let her show me the computer websites How great
Enjoy your blog, but especially your photos. They are so unique and colorful. Can't wait to see what you do with the typesetting!
ReplyDelete